SwiftUIでカラーピッカーを作るという連載記事です。もっと小規模なコードになると思っていたので、あまり整理しないでコードを付け足して来てしまったため、コードがごちゃごちゃになってしまいました。今回はコードの整理をしたいと思います。
1チャネルのモデル
この連載で作っているカラーピッカーはRGBカラーモデルで、次の3つのチャネルを持っています。
- Red
- Green
- Blue
各チャネルが持つ情報を整理すると次のようになります。
- チャネルの名前
- 現在値
- 現在値の編集フィールドに入力中のテキスト
1チャネルのグラデーションビューの描画やタップの処理のために、次の情報も必要です。
- グラデーションビューのビューサイズ
- グラデーションの開始色(左端の色)
- グラデーションの終了色(右端の色)
これを元に、モデルクラスを作ります。
ColorPickerChannelModelColorPickerGradationModel
ColorPickerChannelModelの実装
ColorPickerChannelModelを実装します。
currentValueは取り得る値の範囲が決まっています。範囲外の値が設定されそうになったら、範囲内に丸めたいので次のような実装にしました。
- プロパティの他に、範囲外のチェックと丸めを行う
changeCurrentValueメソッドを実装する。 - 範囲外チェックを行うときは
changeCurrentValueメソッドを使う。
実装したコードは次のようになります。
import SwiftUI

class ColorPickerChannelModel : ObservableObject {
    /// チャネル名
    @Published var channelName: String

    /// 現在値
    @Published var currentValue: Double = 0.0

    init(channelName: String) {
        self.channelName = channelName
    }

    /// 入力中のテキスト
    private var fieldTextStore: String?

    /// 入力中のテキストのバインディング
    var fieldText: Binding<String> {
        Binding {
            self.fieldTextStore ?? String(format: "%.1f", self.currentValue)
        } set: {
            self.fieldTextStore = $0
            if let value = Double($0) {
                self.changeCurrentValue(value)
            }
        }

    }

    /// 現在値の更新
    func changeCurrentValue(_ value: Double) {
        if value < 0.0 {
            currentValue = 0.0
        } else if value > 1.0 {
            currentValue = 1.0
        } else {
            currentValue = value
        }
    }

    /// 入力中のテキストをクリア
    func clearFieldText() {
        fieldTextStore = nil
    }
}
ColorPickerGradationModelの実装
ビューのサイズとグラデーションの色をプロパティで保持できるモデルクラスにします。シンプルにストアドプロパティで実装します。
また、チャネル毎に色は異なりますが、使いやすくしたいので、Redチャネル、Greenチャネル、Blueチャネルの情報を入れたインスタンスを取得するスタティックプロパティを作ります。
実装したコードは次のようになります。
import SwiftUI

class ColorPickerGradationModel : ObservableObject {
    /// グラデーションビューのサイズ
    @Published var viewSize: CGSize = CGSize()
    /// グラデーションの開始色
    @Published var startColor: Color
    /// グラデーションの終了色
    @Published var endColor: Color

    /// イニシャライザ
    /// - Parameters:
    ///     - startColor: グラデーションの開始色
    ///     - endColor: グラデーションの終了色
    init(startColor: Color, endColor: Color) {
        self.startColor = startColor
        self.endColor = endColor
    }
}

extension ColorPickerGradationModel {

    /// RGBカラーモデルのRedチャネル
    static var red: ColorPickerGradationModel {
        ColorPickerGradationModel(startColor: Color(red: 0.0, green: 0.0, blue: 0.0),
                                  endColor: Color(red: 1.0, green: 0.0, blue: 0.0))
    }

    /// RGBカラーモデルのGreenチャネル
    static var green: ColorPickerGradationModel {
        ColorPickerGradationModel(startColor: Color(red: 0.0, green: 0.0, blue: 0.0),
                                  endColor: Color(red: 0.0, green: 1.0, blue: 0.0))
    }

    /// RGBカラーモデルのBlueチャネル
    static var blue: ColorPickerGradationModel {
        ColorPickerGradationModel(startColor: Color(red: 0.0, green: 0.0, blue: 0.0),
                                  endColor: Color(red: 0.0, green: 0.0, blue: 1.0))
    }
}
グラデーションビュー
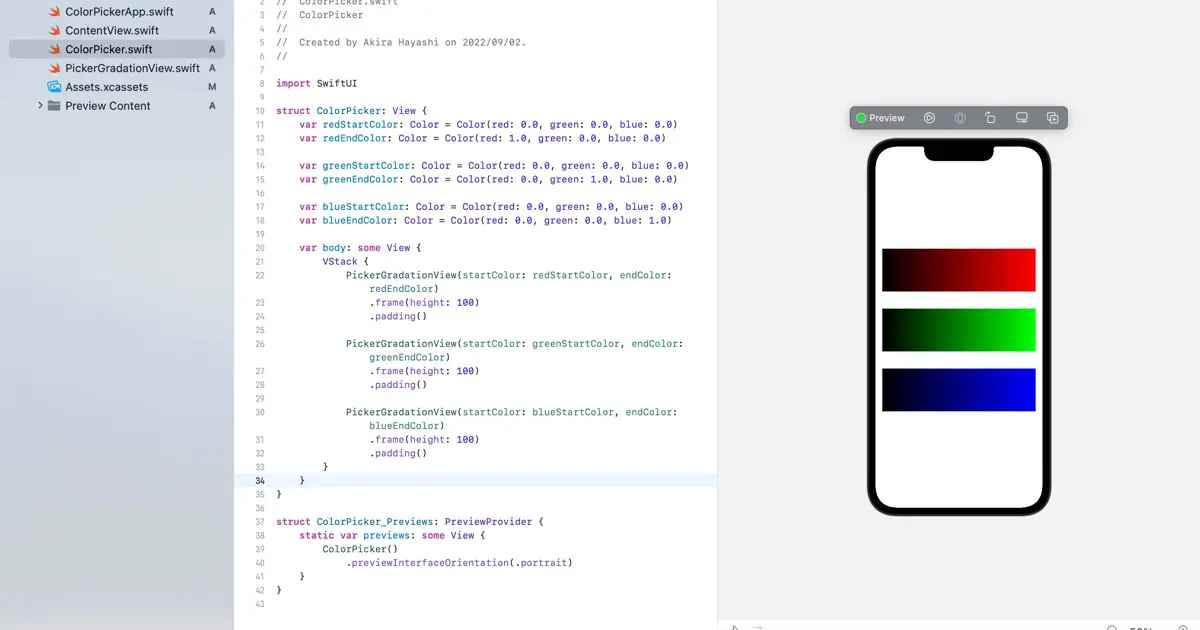
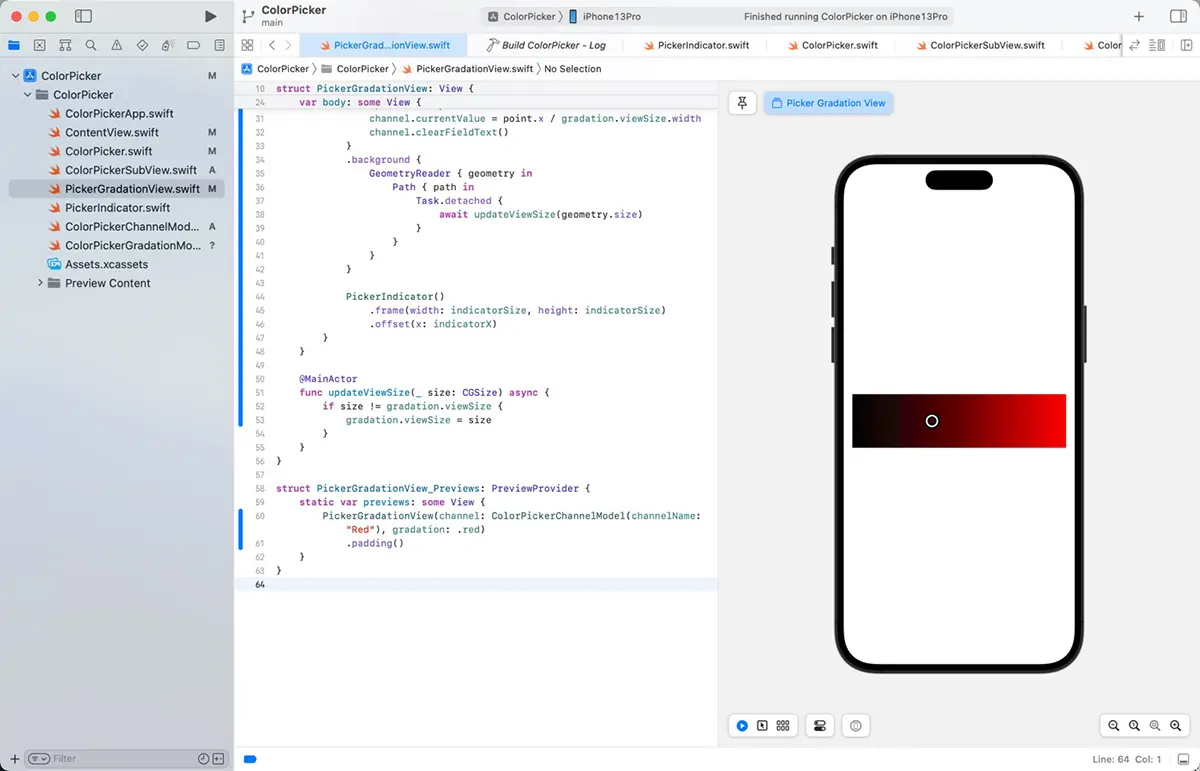
前回までの状態は、ColorPickerがPickerGradationViewとPickerIndicatorを管理して、モデルに分離した情報も管理するという構造になっていました。これをPickerGradationViewがPickerIndicatorを持って管理するように変更します。
モデルは上位から渡されるようにします。
ビューの高さもPickerGradationViewの中で固定にします。
PickerGradationViewの実装
実装したコードは次のようになります。
import SwiftUI

struct PickerGradationView: View {
    @ObservedObject var channel: ColorPickerChannelModel
    @ObservedObject var gradation: ColorPickerGradationModel

    /// ノブの大きさ
    let indicatorSize: CGFloat = 20
    /// グラデーションビューの高さ
    let gradationHeigh: CGFloat = 100

    /// ノブのX座標
    var indicatorX: CGFloat {
        gradation.viewSize.width * channel.currentValue - indicatorSize / 2
    }

    var body: some View {
        ZStack(alignment: .leading) {
            GeometryReader() { geometry in
                LinearGradient(gradient: Gradient(colors: [gradation.startColor, gradation.endColor]), startPoint: UnitPoint(x: 0, y: 0), endPoint: UnitPoint(x: 1, y: 0))
            }
            .frame(height: gradationHeigh)
            .background {
                GeometryReader { geometry in
                    Path { path in
                        Task.detached {
                            await updateViewSize(geometry.size)
                        }
                    }
                }
            }
            .onTapGesture { point in
                channel.currentValue = point.x / gradation.viewSize.width
                channel.clearFieldText()
            }

            PickerIndicator()
                .frame(width: indicatorSize, height: indicatorSize)
                .offset(x: indicatorX)
        }
    }

    @MainActor
    func updateViewSize(_ size: CGSize) async {
        if size != gradation.viewSize {
            gradation.viewSize = size
        }
    }
}

struct PickerGradationView_Previews: PreviewProvider {
    static var previews: some View {
        PickerGradationView(channel: ColorPickerChannelModel(channelName: "Red"), gradation: .red)
            .padding()
    }
}
チャネル毎のビュー
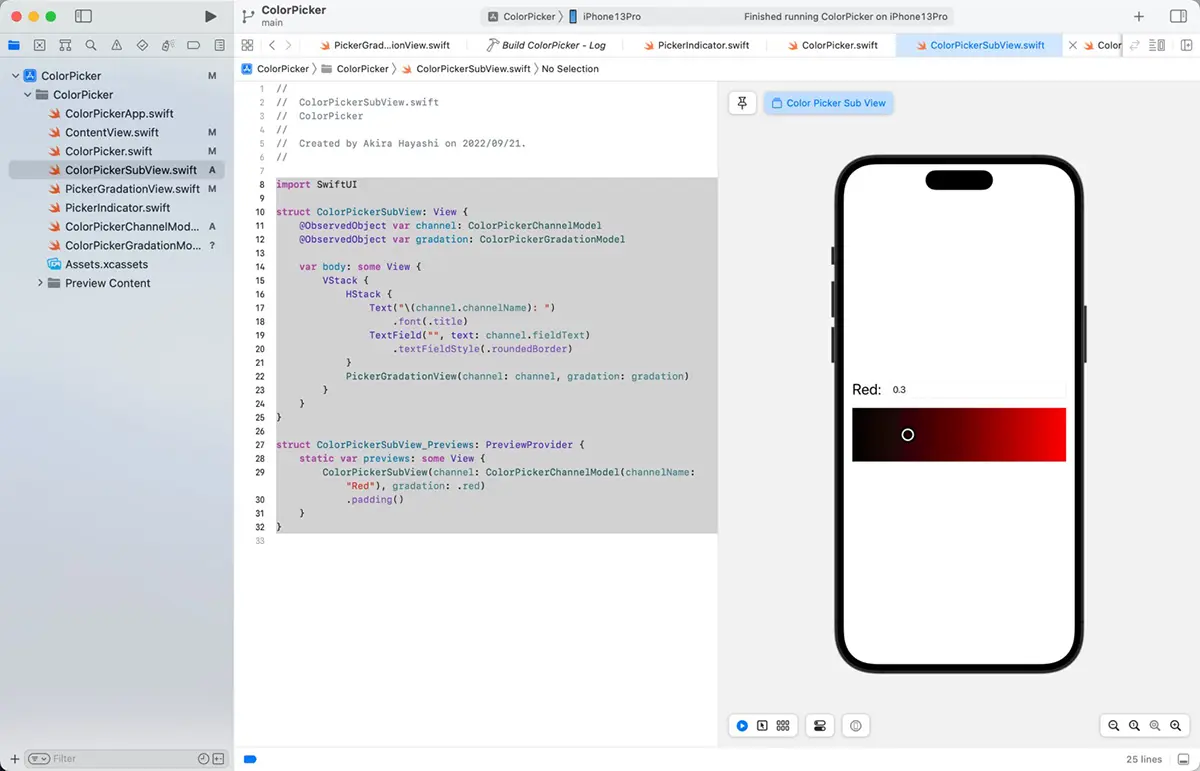
RGBカラーモデルのカラーピッカーは、各チャネルの値と表示色は異なりますが、ビューの構成は同じです。前回までの実装ではColorPickerビューが直接、全チャネルのラベルなどを作っていました。これだとコードが分かりづらいので、チャネル毎に作成するビューに切り出します。

この構造も問題が出たので連載の後半で変更が必要になりました。
ColorPickerSubViewの実装
チャネル毎に以下のビューを作ります。
PickerGradationView- チャネル名のラベル
- 現在値を編集するためのテキストフィールド
次のようなコードになります。
import SwiftUI

struct ColorPickerSubView: View {
    @ObservedObject var channel: ColorPickerChannelModel
    @ObservedObject var gradation: ColorPickerGradationModel

    var body: some View {
        VStack {
            HStack {
                Text("\(channel.channelName): ")
                    .font(.title)
                TextField("", text: channel.fieldText)
                    .textFieldStyle(.roundedBorder)
            }
            PickerGradationView(channel: channel, gradation: gradation)
        }
    }
}

struct ColorPickerSubView_Previews: PreviewProvider {
    static var previews: some View {
        ColorPickerSubView(channel: ColorPickerChannelModel(channelName: "Red"), gradation: .red)
            .padding()
    }
}

RGBカラーモデルのカラーピッカー
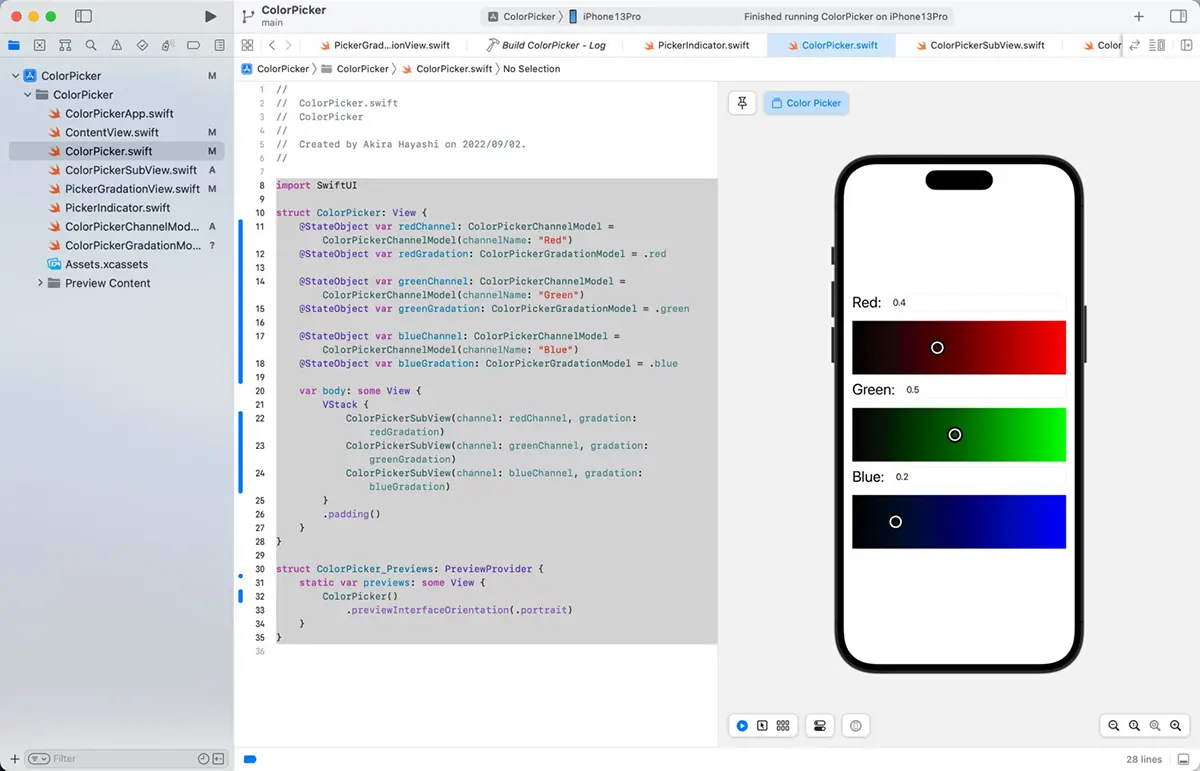
チャネル毎のビューと必要なモデルが実装できました。ここまで実装したビューとモデルを組み合わせて、3つのチャネルを持ったRGBカラーモデルのカラーピッカーを作ります。
前回までに実装したColorPickerChannelValue.swiftファイルは不要になったので、削除します。
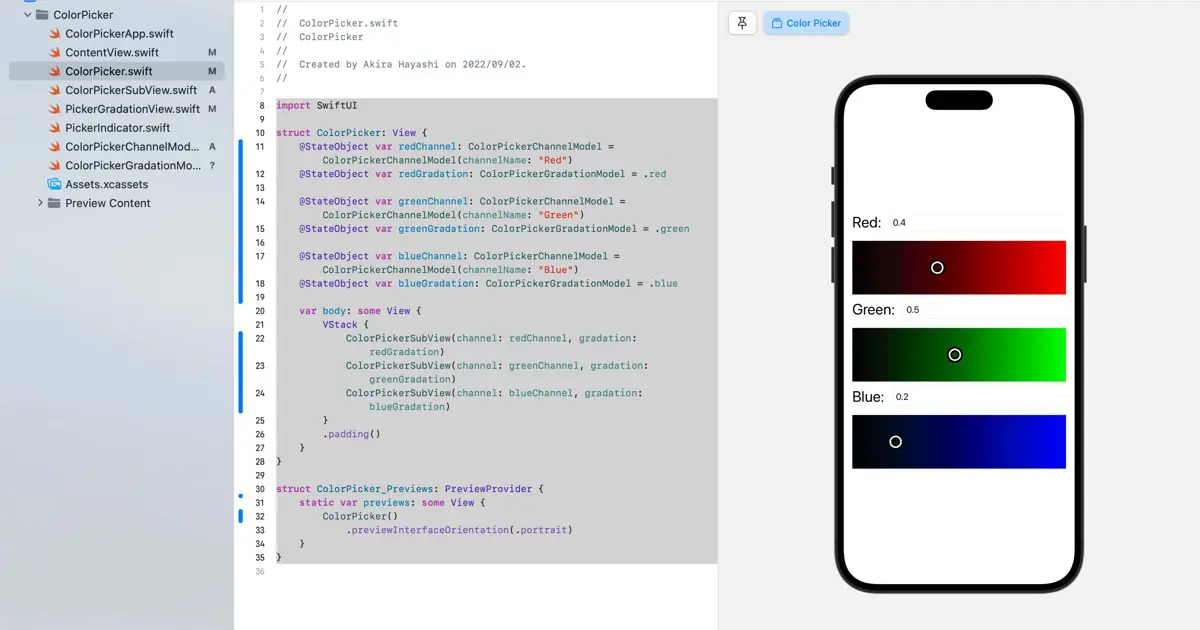
ColorPicker.swiftのコードも大幅に変更になります。PickerGradationView, ColorPickerChannelModel, ColorPickerGradationModel を使って実装します。
次のようなコードになりました。
import SwiftUI

struct ColorPicker: View {
    @StateObject var redChannel: ColorPickerChannelModel = ColorPickerChannelModel(channelName: "Red")
    @StateObject var redGradation: ColorPickerGradationModel = .red

    @StateObject var greenChannel: ColorPickerChannelModel = ColorPickerChannelModel(channelName: "Green")
    @StateObject var greenGradation: ColorPickerGradationModel = .green

    @StateObject var blueChannel: ColorPickerChannelModel = ColorPickerChannelModel(channelName: "Blue")
    @StateObject var blueGradation: ColorPickerGradationModel = .blue

    var body: some View {
        VStack {
            ColorPickerSubView(channel: redChannel, gradation: redGradation)
            ColorPickerSubView(channel: greenChannel, gradation: greenGradation)
            ColorPickerSubView(channel: blueChannel, gradation: blueGradation)
        }
        .padding()
    }
}

struct ColorPicker_Previews: PreviewProvider {
    static var previews: some View {
        ColorPicker()
            .previewInterfaceOrientation(.portrait)
    }
}

まとめ
ColorPickerに全てが押し込まれていて、非常に見通しの悪いネストが多いコードになっていましたが、今回の整理後のコードは、モデルとビューに分離し、ネストも浅くなり、見やすいコードになったと思います。
SwiftUIで採用するべきアーキテクチャは何が良いかということが、ネット上では話題に上ることが多くあります。SwiftUIではMVVMかTCAが話題に多く上ります。今回の記事で整理した後のコードは、MVVMをベースにして、VM(View Model)は削除した状態です。この規模だとViewとModelだけでも十分かなと思いました。
ただ、ObservableObjectはView Modelそのものだという意見もあり、そう捉えるとMVVMになったとも言えると思います。
いずれにしても、個人的にはどのアーキテクチャかということよりも、見通しが良いコードになっていれば良いと思っています。
コードのダウンロード
今回の記事で作成したコードのダウンロードはこちらです。

