
When developing native apps, like iOS and Android, and implementing a process that interacts with a web server via HTTP/HTTPS, you often need fixed data to be returned.
For example, when unit testing communication processes in XCTest. Numerous instances may require only HTTP/HTTPS communication throughout the implementation and debugging stages.
In such cases, Docker is useful. For example, you can containerize Nginx in Docker and communicate with it while working on the implementation.
How to containerize and run
The following simplified steps are adequate for lighter tasks, like handling a small amount of communication during application implementation. While using nginx, adding nginx configuration files as needed is sufficient.
Creating a Docker Image
Begin by creating the Dockerfile file and inputting the following code.
FROM nginx:1.23About Tags
While 1.23 represents a version number, it’s referred to as a tag in the context of Dockerfile.
You can check the official image tags at the docker hub. nginx can be found at the following link.
Definition of Composer
Create a file named docker-compose.yml and enter the following code.
version: "3"
services:
    nginx:
        build: .
        ports:
            - 8080:80
        volumes:
            - ./content_home:/usr/share/nginx/html
Service Definition
This file defines a service named nginx.
Image Designation
The nginx Docker image is specified as build: ., indicating that it will be built based on the Dockerfile located in the same directory as the docker-compose.yml file.
Port number
The port number of nginx communication is specified by ports. The 80 port inside the container is connected to the external 8080 port. Therefore, when connecting from outside the container, if you connect to port 8080, you will be connected to port 80 inside.
Directory Designation
The volumes maps the /usr/share/nginx/html directory in nginx to the local directory content_home. Although it is a folder that has not yet been created, accessing /usr/share/nginx/html from within the container will access the content_home directory in the local file system.
Creating files to be placed on the Web server
Create the directory specified with volumes. content_home folder is created in the same directory as the Dockerfile and docker-compose.yml. content_home directory becomes the root directory of the web server. Place the files you want to place on the web server in the content_home directory.
For example, create a content_home/index.html file with the following contents.
<!DOCTYPE html>
<html lang="ja">
<head>
	<meta charset="utf-8" />
	<title>Simple HTML</title>
</head>
<body>
    <p>Simple HTML in the Docker container.</p>
</body>
</html>
Running Containers
In a terminal, go to the directory where docker-compose.yml is placed and run docker-compose as follows.
% docker-compose up -ddocker-compose up reads docker-compose.yml and runs the service. It is started as a daemon with the -d option.
Connection test
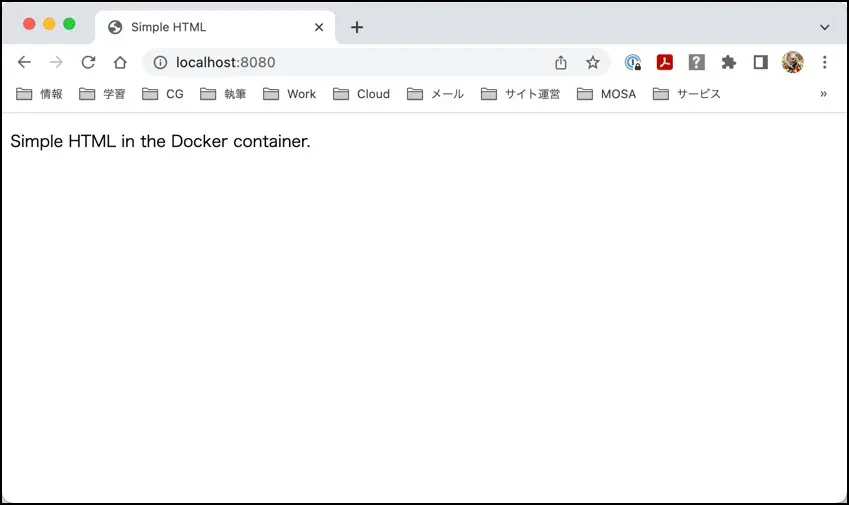
On the machine which runs Docker, open the following URL from a web browser.
http://localhost:8080/If successful, the contents of index.html will be displayed.
Stopping the Container
In a terminal, go to the directory where docker-compose.yml is placed and run docker-compose as follows.
% docker-compose downdocker-compose down stops the service.
Conclusion
Utilizing Docker simplifies setting up a test server, making it easier than creating a virtual PC with platforms like Parallels Desktop, VMware, or Virtual Box.
Additionally, managing all files in Git simultaneously -including definition and deployment files – is highly convenient.