Notarization in macOS is a system that ensures the safety of non-App Store apps, command-line tools, and kernel extensions (kexts). Through notarization, developers submit their programs to Apple’s Notary Service. When users launch the program, macOS verifies whether it’s registered. If not, the system prevents it from launching.
The following article also details the notarization process:

Both Xcode and notarytool can be used for notarization. Xcode offers a user-friendly graphical interface, though it’s less suitable for automation in CI/CD pipelines and scripting.
Notarytool, a command-line utility, is executed from the terminal and is easily automated in CI/CD pipelines and scripting.
You might be familiar with altool, another command-line tool for notarization, but it’s no longer supported. From November 1, 2023, notarytool or Xcode 14 and later versions are required.

This article will guide you through notarizing with notarytool.
Overview
Before using notarytool, ensure you:
- Locate your developer team ID.
- Set up two-factor authentication for your Apple ID.
- Store your credentials in the keychain.
To notarize your apps, follow these steps:
- Enable hardened runtime or sandboxing in your app.
- Sign your code with your Developer ID Application Certificate.
- Submit your app using notarytool.
- Staple your app using notarytool.
Locating Your Developer Team ID
Notarytool creates profiles for each set of credentials, storing them in your keychain. These profiles are unique to each developer team. If you work with multiple teams, you’ll have several profiles.
To create a profile, you must know your team ID, found on the Apple Developer Site’s account page:
- Sign in to the Apple Developer Site.
- Select your developer team from the top right.
- Click “Membership details.”
- Your team ID will be displayed under “Team ID.”
Creating an App-Specific Password for Two-Factor Authentication
Two-factor authentication is mandatory for Apple IDs used as developer accounts. Notarytool requires an app-specific password for the Apple ID. For instructions on generating and using this password, see “How to create the Apple ID’s app-specific password.”

Storing the Profile in the Keychain
To Store the notarytool credentials in the keychain, run this command:
xcrun notarytool store-credentials "AC_PASSWORD" --apple-id "[email protected]" --team-id TEAMID --password examplepasswordReplace AC_PASSWORD, [email protected], TEAMID, and examplepassword with your information.
A successful storage operation will display the following message:
This process stores your credentials securely in the Keychain. You reference these credentials later using a profile name.

Validating your credentials...
Success. Credentials validated.
Credentials saved to Keychain.
To use them, specify `--keychain-profile "AC_PASSWORD"`
Viewing in Keychain Access
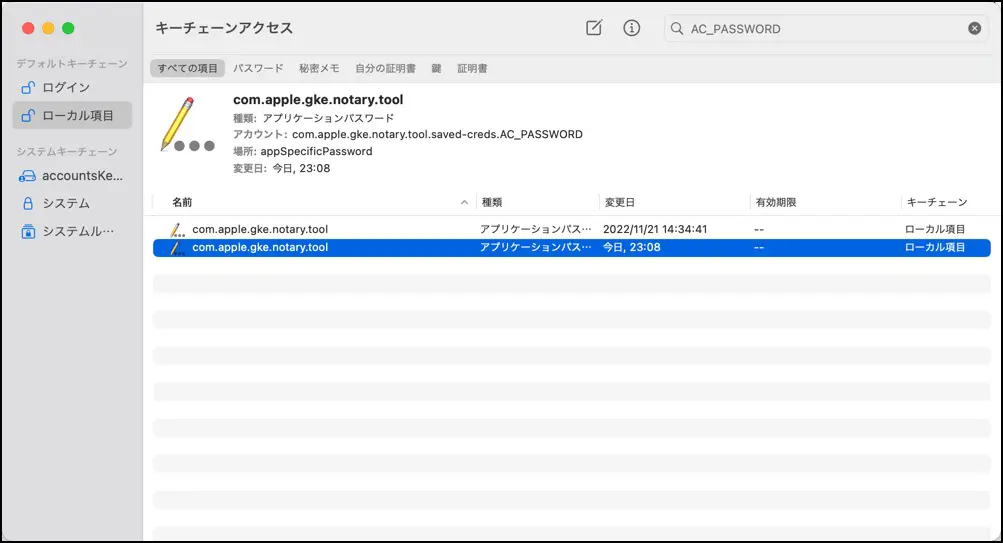
In Keychain Access, the profile appears as com.apple.gke.notary.tool. The account name for the AC_PASSWORD profile is com.apple.gke.notary.tool.saved-creds.AC_PASSWORD. This naming convention helps differentiate between multiple profiles.
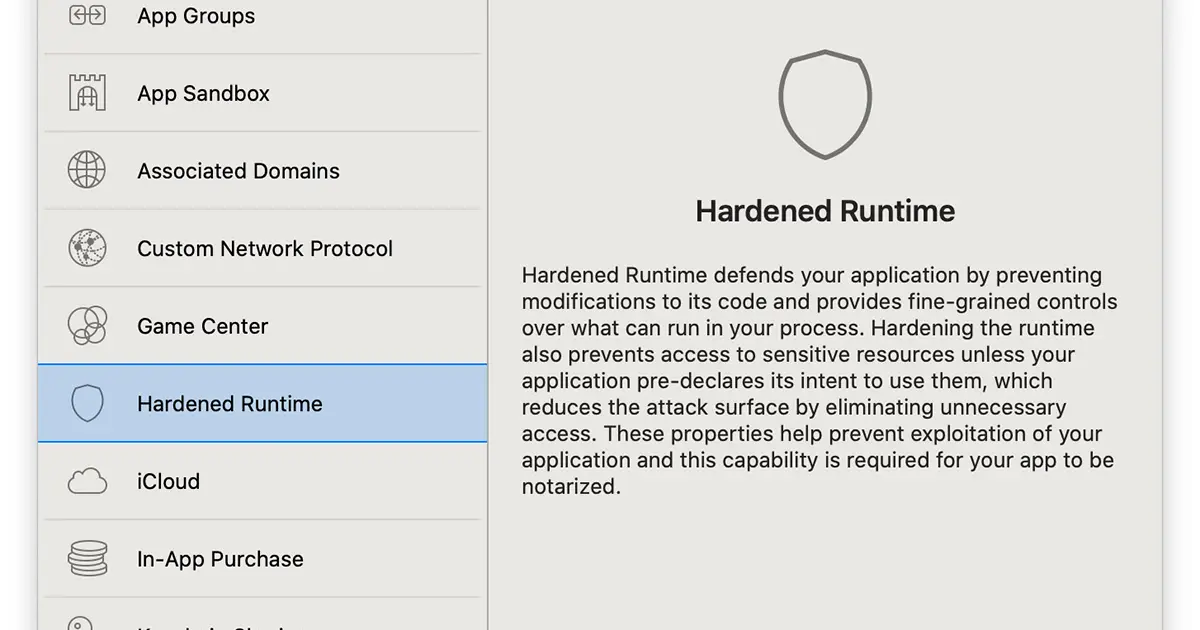
Enabling Hardened Runtime or Sandboxing
Notarizing an app requires enabling either the hardened runtime or sandboxing. Sandbox environments restrict apps to their own directories, preventing access to other app’s folders and sensitive system areas.
If your app’s functionality is compatible with sandboxing, it’s the preferred option. However, some functions may require the Hardened Runtime, which safeguards the integrity of a program by blocking external tempering. Certain features, like JIT compilers, might be affected, but you can enable them specifically through entitlements.
Refer to this article for Xcode build settings relevant to Apple Notarization Service.
Preparing the Disk Image for Upload
It is recommended to upload apps in disk image format to avoid various issues. If distributing installers, they must be created in the flat package format, as the mpkg format is not supported.
For detailed instructions on creating installers, see these articles:


Uploading to Apple Notary Service
Upload your disk image using this command:
xcrun notarytool submit MyApp.dmg --keychain-profile "AC_PASSWORD" --waitThe --wait option makes the tool wait for notarization results, which can take a few minutes to 20 minutes, depending on the app size. A successful notarization will display “Accepted.”
Stapling
After notarization, embed the notarization ticket into the file for offline use with this command:
xcrun stapler staple "MyApp.dmg"Conclusion
As outlined in this article, notarization with notarytool involves straightforward command execution. Its integration into scripts is more convenient than previous methods, thanks to options like --wait.
The altool is no longer supported. You need to migrate to notarytool.